Key Takeaways
- Dirty brushes = bacteria, clogged pores, patchy makeup, and breakouts.
- Most people should deep-clean brushes once a week, with quick cleans between uses.
- You don’t need fancy products – gentle soap, lukewarm water, and a clean towel can work wonders.
- Never soak brushes upright in water or dry them bristle-up – that can loosen glue and ruin handles.
- Treat your brushes like little investments: clean, reshape, and dry them flat and they’ll last for years.
To clean makeup brushes, wet only the bristles with lukewarm water, then gently swirl them in a small amount of gentle soap or brush cleanser. Massage the bristles with your fingers or a cleaning mat until the makeup residue loosens, rinse until the water runs clear, gently squeeze out excess water, reshape the bristles, and lay the brushes flat to dry with the bristles hanging slightly over the edge of a counter. Avoid soaking the ferrule (metal part) to prevent damage.
Introduction: How to Clean Makeup Brushes Without Wrecking Them
I’ll be honest: for a long time, “how to clean makeup brushes” wasn’t on my list of life priorities. I’d tell myself, “I’ll wash them this weekend,” and then three weekends later that same foundation brush looked like it could stand up on its own.
If you’ve ever swirled your brush in a pan and thought, “This looks… crusty,” you’re not alone. Most of us know we should clean our brushes more, but we either:
- Don’t know the right way
- Are afraid of ruining them
- Or just plain forget until our skin starts complaining
The good news? Cleaning makeup brushes is way simpler than it seems. Once you understand a few basics, it becomes a quick, oddly satisfying ritual – like laundry for your face tools.
In this guide, we’ll walk through:
- Why brush hygiene matters more than you think
- How often you really need to clean (no guilt, just reality)
- A step-by-step method that works for almost any brush
- The difference between a quick clean and a deep clean
- How to dry brushes so they stay soft instead of frizzy and sad
Let’s turn those “seen things” brushes back into soft, fluffy clouds.
Why Cleaning Makeup Brushes Actually Matters
Yes, it’s about keeping your tools pretty – but it’s also about your skin and your makeup performance.
What Builds Up on Your Brushes
Over time, your brushes collect:
- Old makeup
- Skin oils
- Dead skin cells
- Dust
- Bacteria from your skin and the air
Cute, right?
What Happens If You Don’t Clean Them
When you don’t wash your brushes regularly, you can get:
- Breakouts and irritation
- Dirty bristles keep pushing bacteria and oil back into your pores.
- Patchy, streaky makeup
- Old product changes the color and texture of what you’re applying.
- Shorter brush lifespan
- Product buildup makes bristles stiff and more likely to shed or snap.
- Weird smells
- Especially from cream and liquid product brushes (looking at you, foundation and concealer).
So yes, it’s a bit of a chore, but it’s also one of the easiest, cheapest things you can do for better skin and better makeup.
Read Also: How to Get Hollow Cheeks
How Often Should You Clean Makeup Brushes?
Let’s be realistic, not perfect. You don’t need to deep-clean every single day, but you do want a routine.
General Frequency Guide
Here’s a simple baseline you can adjust for your life:
| Brush Type | Product Type | How Often to Deep Clean |
|---|---|---|
| Foundation & concealer brushes | Liquid/cream | Every 3–4 uses (about weekly) |
| Powder face brushes | Powder (blush, etc.) | Once a week or every 2 weeks |
| Eyeshadow brushes | Powder | Weekly (more often if daily) |
| Eyeliner & brow brushes | Cream/gel | After each use or every 1–2 uses |
| Beauty sponges/blenders | Liquid/cream | After every use, minimum every 2 uses |
If you have sensitive or acne-prone skin, lean toward more frequent cleaning, especially for anything that touches foundation or concealer.
Read Also: How to Become a Head Spa Technician
What You Need to Clean Makeup Brushes
You don’t need a deluxe brush-cleaning spa. Most supplies are already in your bathroom or kitchen.
Basic Supplies
- Lukewarm water
- Gentle cleanser, such as:
- Baby shampoo
- Mild, fragrance-free face wash
- Dish soap (for very greasy, synthetic brushes only, used sparingly)
- Or a dedicated brush cleanser
- A small bowl or the palm of your hand
- A clean towel (preferably something you don’t mind getting stained)
- Optional: silicone brush cleaning mat or glove
Products to Avoid (Most of the Time)
Try not to use:
- Harsh bar soaps with strong perfumes
- Hot water (can damage bristles and loosen glue)
- Strong alcohols on natural hair brushes (can dry them out)
Treat your brushes the way you’d treat your hair: gentle shampoo, lukewarm water, and no boiling.
How to Clean Makeup Brushes Step-by-Step
Here’s the simple method I wish I’d been taught years ago.
Step 1: Get the Bristles Damp, Not Soaked
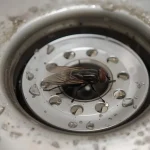
- Hold the brush bristle-down under lukewarm running water.
- Avoid getting water on the ferrule (the metal part) and handle – that’s where the glue is.
- Just the bristles need to be wet.
Step 2: Add Cleanser
Two options:
- In your hand:
- Put a small drop of cleanser in the palm of your hand.
- Swirl the wet brush gently in your palm.
- In a bowl/mat:
- Add a bit of cleanser and water to a small bowl or onto a cleaning mat.
- Swirl the brush until it starts releasing makeup.
Step 3: Gently Massage Out the Makeup
- Use small circular motions and light pressure.
- You’ll see makeup coming out into the soap – oddly satisfying.
- For dense foundation brushes, use your fingers to gently work cleanser deeper into the bristles.
Step 4: Rinse Until Water Runs Clear
- Rinse the brush bristle-down under lukewarm water.
- Keep going until:
- No more color runs from the bristles
- The water looks clear, not cloudy
If the water still looks like a melted foundation stick, repeat steps 2–3.
Step 5: Gently Squeeze Out Excess Water
- With clean hands, press the brush between your fingers from ferrule to tip.
- Don’t pull or twist the bristles – that’s how you get shedding.
Step 6: Reshape the Brush
- Gently coax the bristles back into their original shape.
- This keeps your brush looking neat and helps it dry in the right form.
Step 7: Lay Flat to Dry
- Place brushes on a clean towel, bristles hanging slightly over the edge of a counter so they can air-dry all around.
- Keep them flat, not upright. Drying with the bristles up can let water drip into the ferrule, loosening the glue.
Let them dry fully before using again – usually overnight is perfect.
Quick Clean vs. Deep Clean: When to Use Which
Sometimes you’ve got five minutes and three dirty eyeshadow brushes. This is where quick cleaning comes in.
Quick Clean (Between Uses)
Best for:
- Switching colors quickly
- Light daily refreshes
You can:
- Use a brush cleaning spray:
- Spray on a paper towel or cloth
- Swirl the brush until color comes off
- Use a bit of micellar water on a cotton pad for powder brushes
This doesn’t fully sanitize, but it removes surface pigments so you’re not turning every look into a muddy blend.
Deep Clean (Weekly-ish)
Best for:
- Foundation, concealer, cream-product brushes
- Brushes used daily on the face
Deep cleaning uses water + soap, following the full 7-step process. This is where you really clear out oils, bacteria, and old product.
How to Clean Beauty Sponges and Blenders
These little sponges are amazing – and also bacteria magnets if you ignore them.
Steps for Cleaning Makeup Sponges
- Wet the sponge under lukewarm water until it expands fully.
- Add a bit of liquid soap directly to the sponge.
- Squeeze and massage under running water:
- Press, release, repeat (like you’re gently wringing a tiny stress ball).
- Keep going until the water runs mostly clear and the sponge looks close to its original color.
- Gently squeeze out excess water with a clean towel.
- Let it air-dry in an open, well-ventilated spot – not in a closed makeup bag.
Sponges should be cleaned after every use or every couple of uses, and replaced every few months if they start ripping, smelling weird, or never look clean anymore.
Common Mistakes When Cleaning Makeup Brushes
If your brushes ever ended up crunchy or misshapen, you’re not alone.
Mistakes to Avoid
- Soaking brushes in a cup of water
- Water gets into the ferrule, loosening glue and causing shedding.
- Using hot water
- Can damage synthetic bristles and dry out natural hair.
- Standing them upright to dry
- Moisture runs into the base, loosening the glue over time.
- Using harsh cleaners or bleach
- Overkill for brushes and rough on your skin later.
- Scrubbing too aggressively
- Bristles fray and lose their shape, especially on delicate eye brushes.
Gentle and consistent beats aggressive and rare every time.
How to Tell When a Brush Is Past Saving
Even with good care, brushes aren’t immortal.
Signs It’s Time to Replace a Brush
- Constant shedding, even after gentle washing
- Bristles that stay stiff or frizzy no matter how you reshape
- A permanent stain + smell combo that deep cleaning can’t fix
- The ferrule is loose or the handle is cracking badly
High-quality brushes can last for years if you take care of them, but when one starts fighting you at every step, it’s okay to let it go.
Frequently Asked Questions
Yes, as long as it’s a gentle shampoo, baby shampoo, or mild cleanser. Avoid super harsh, heavily scented shampoos, especially for natural hair brushes, because they can dry out the bristles.
Most brushes need several hours or overnight to dry completely, especially dense face brushes. That’s why many people wash them in the evening and let them dry on a towel overnight.
Dish soap can be useful for very greasy synthetic brushes, like foundation brushes, but use it sparingly and follow with a gentle rinse. For regular use, a milder soap or brush cleanser is kinder to both bristles and skin.
No, it’s optional. A mat or glove can make cleaning faster and more thorough, especially if you have a lot of brushes, but your hand works just fine as long as you’re gentle and patient.
They can absolutely make breakouts worse or keep them hanging around. Dirty brushes reapply oil, bacteria, and old makeup back onto your skin. For acne-prone or sensitive skin, regular brush cleaning is a simple way to help your routine work better.
Summary
Cleaning makeup brushes doesn’t need to be a complicated, once-in-a-blue-moon project. With some gentle soap, lukewarm water, and 10–15 minutes, you can:
- Keep your skin happier and less congested
- Make your makeup go on smoother and more evenly
- Extend the life of the tools you spent good money on
The key is consistency: quick cleans between uses when you can, and a proper deep clean about once a week, especially for face brushes. Keep water away from the ferrule, reshape your bristles, dry them flat – and suddenly your brush collection looks (and works) like new again.
Think of it as giving your brushes a mini spa day. Your skin, your makeup, and your future selfies will all thank you.